

 English
 Deutsch
 Español
 русский

Home · News · Industry News · Rack Cable Management Best Practices: A Practical Guide for Structured Cabling
Industry News
Rack Cable Management Best Practices: A Practical Guide for Structured Cabling
2026-09-14Content
- 1 Why Rack Cable Management Affects Uptime and Airflow
- 2 Plan the Rack Before You Patch a Single Port
- 3 Seven Best Practices That Work in Any Rack
- 4 Choose Cable Managers Based on Rack Density
- 5 Airflow Is the Hidden Reason for Cable Management Rules
- 6 Run a Ten-Minute Rack Audit Before the Next Incident
- 7 Rack Cable Management FAQ
Imagine walking up to a 42U rack at the end of a long maintenance window. A port on the third patch panel is dead, the label is hidden, and the patch cords all disappear into the same tangle. You pull one cable, and a bundle on the other side moves with it. That is the real cost of treating rack cable management as an afterthought.
The conclusion is simple: rack cable management best practices are not about making the rack look neat for a photo. They are a maintenance strategy that protects uptime, improves airflow, and makes every future change faster.
Why Rack Cable Management Affects Uptime and Airflow
Unmanaged cables are not just an eyesore. They block the front air intakes of switches and servers, which raises component temperatures and shortens equipment life. They also hide the identity of each connection. When a port fails, a technician cannot see which cable goes where, so a five-minute fix becomes a thirty-minute trace. In a rack carrying Cat6A or Cat8 patch cords, the problem is worse because those cables have thicker jackets and take up more space.
- Cables bunching over switches restrict airflow and increase cooling load.
- Dust and debris collect on tangled horizontal runs, causing port contamination over time.
- Dense bundles put stress on connectors and can cause intermittent link drops.
- Moving one cable can accidentally unseat another, creating a second fault while you fix the first.
Plan the Rack Before You Patch a Single Port
Never patch ports blindly. A rack layout should exist before the first cable is installed. Start with a simple drawing of the rack and mark where every panel, switch, and power outlet will go.
- Draw the front elevation of the rack and label each planned unit.
- Place high-density switches close to the patch panels they serve.
- Position horizontal managers between each patch panel and switch, and plan vertical managers on both sides.
- Keep the power distribution unit on one side and data cabling on the other.
- Decide where backbone cables enter and leave the rack before pulling any horizontal cabling.
If a specific layout needs non-standard panel widths or unusual mounting arrangements, a manufacturer with flexible ODM/OEM experience can adjust the hardware. BTBL’s customization page shows how structured cabling components can be tailored for a project.
Seven Best Practices That Work in Any Rack
After the layout is set, these habits separate a rack that stays maintainable from one that gets worse with every change.
Separate Power from Data
Run power cords on one side of the rack and data cables on the other. If they must cross, cross them at 90 degrees. Avoid long parallel runs of unshielded data cable and power cords in the same bundle.
Use Hook-and-Loop Fasteners Instead of Zip Ties
Zip ties are appropriate for permanent overhead bundles, but not for the front of a rack. Hook-and-loop fasteners are adjustable, easier to remove, and less likely to crush the cable jacket.
Keep Patch Cords Short and Organized
Use the shortest practical length between ports. Long cords become coils, and coils become future tangles. Store extra length in a horizontal manager instead of letting it hang in front of the device. In lower-density racks, a ring panel gives each bundle a clear path without making changes difficult.
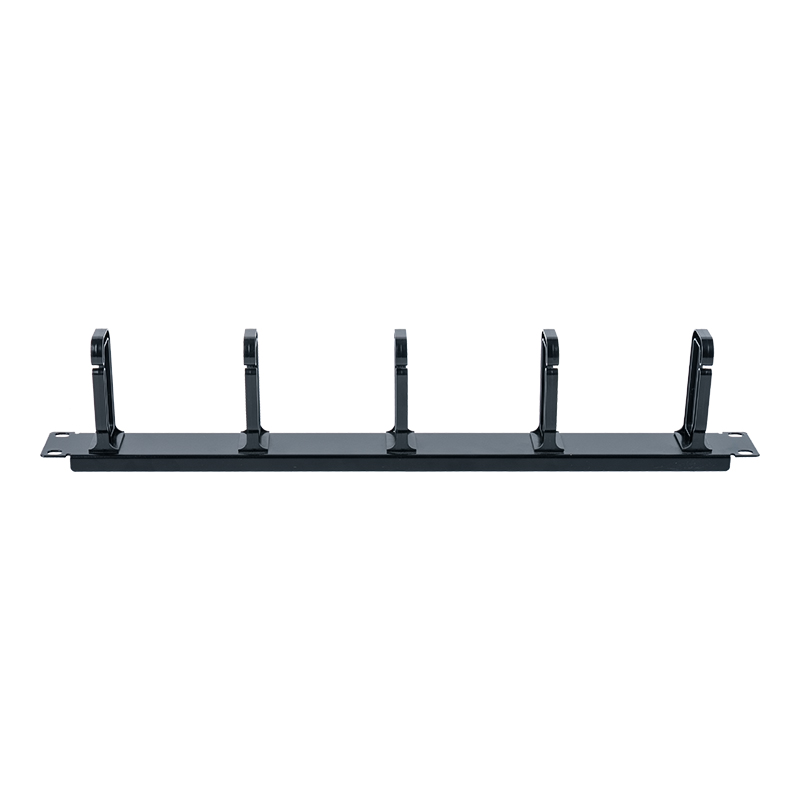 1U Plastic Cable Management Panel with Five Rings for 19-Inch RacksThis 1U panel uses five rings to route and secure horizontal patch cables, reducing tangles in dense racks. Its optional covers and vertical channel help keep cabling organized without taking up extra space.View Product →
Label Both Ends and Use Color Coding
Every patch cord should be labeled at both ends before it is installed. Color-coded cords can identify VLANs, device types, or departments. Color gives a fast physical signal; labels provide the backup when memory fails.
Leave a Service Loop
Keep enough slack to move a cable one or two ports without retermination. Do not push the excess into the front of the rack. Store loops in rear managers or at the side of the cabinet.
Respect Bend Radius
Tight bends are a common cause of hidden intermittent failures. Copper patch cords should respect the manufacturer’s bend radius, and fiber is even stricter. If a cable must bend, use a guide ring or a manager with a smooth, round profile.
Choose Cable Managers Based on Rack Density
No single cable manager fits every rack. The right choice depends on how many patch cords pass through a rack unit and how often you need to move them.
| Manager type | Best use | Trade-off |
|---|---|---|
| Covered horizontal manager | Front of patch panels where appearance and protection matter | Individual cord changes are slower because the cover has to open |
| Brush panel | Pass-through points that need dust control and frequent moves | Thick bundles can be harder to push through the brush |
| Ring manager | Low-density runs where visibility is important | Does not hide cables or block dust |
| Vertical manager | Side-mounted bundles travelling between rack units | Consumes vertical side space and needs careful strap placement |
Where patch panels are the main connection point, a covered horizontal manager keeps the front of the rack clean and prevents a loose wall of patch cords. It works best when the patching pattern does not change often.
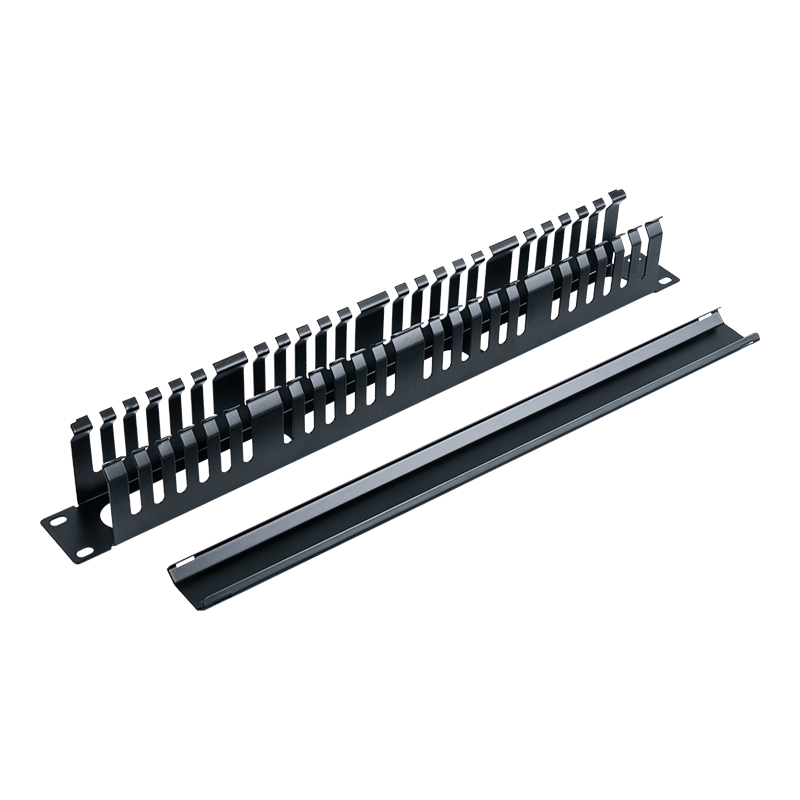 1U Plastic Cable Management Panel with 24 Covered SlotsA covered 24-slot horizontal manager that tidies patch cords in front of panels. It also fills empty rack spaces to improve airflow and suits setups where patching changes are infrequent.View Product →
Airflow Is the Hidden Reason for Cable Management Rules
Most IT equipment draws cool air from the front and exhausts at the rear. A single 1U cable pile can choke the switch behind it. Use blanking panels in empty rack positions and keep the area in front of every device clear.
Brush panels at cable pass-throughs reduce the amount of air that escapes around cable bundles. They are useful at cabinet tops, ceiling entry points, and between rack sections where cables move frequently.
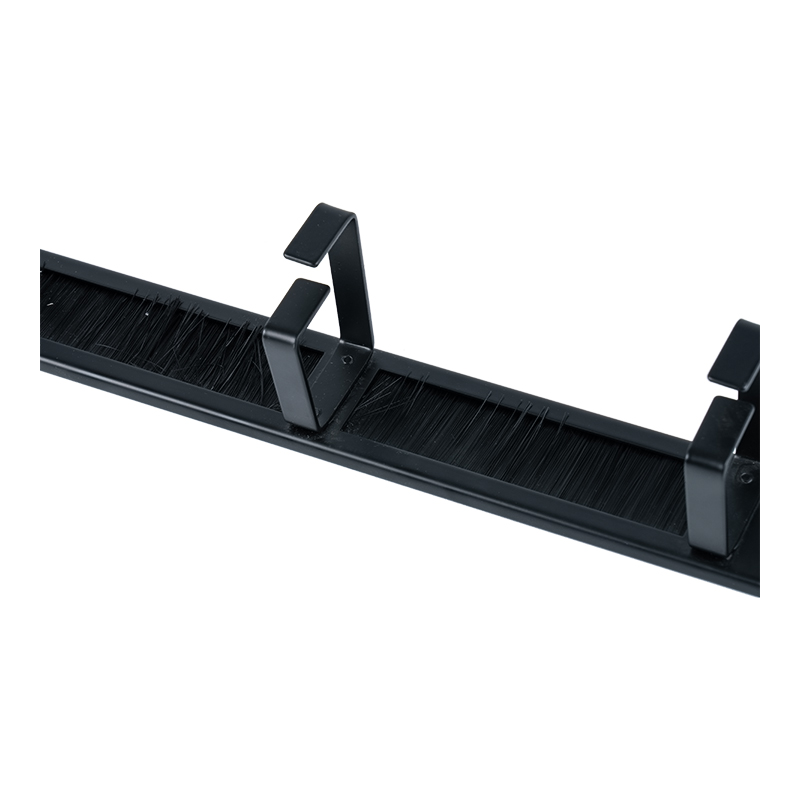 1U Plastic Cable Management Panel with Four Rings and BrushThis brush-equipped panel reduces dust buildup and airflow loss at cable pass-throughs. Its durable plastic construction and standard 1U size make it practical for cabinet tops, ceiling entries, or between rack sections.View Product →
The chart below is an illustrative distribution of issues found in typical rack audits. It is not a scientific statistic, but it reflects the pattern seen in many older IT closets: congestion and poor labeling dominate.
- Cable congestion 38%
- Missing labels 27%
- Power and data crossover 20%
- Insufficient slack 15%
Illustrative distribution of common rack cable management problems found during audits.
Run a Ten-Minute Rack Audit Before the Next Incident
Start with the racks that are hardest to work on. Do not try to rebuild everything in one afternoon; identify quick wins first.
- Photograph the front and rear of the rack before moving anything.
- Trace five patch cords from switch to patch panel and confirm that both ends are labeled.
- Look for power cords running parallel to unshielded data cables.
- Check for cables pressing against switch air intakes.
- Straighten or replace any cable with a sharp bend.
- Fill empty rack units with blanking panels.
After the quick wins, update the rack documentation and store the photos with port assignments. This small habit removes most of the guesswork from future changes. When you replace hardware, match the cable manager to the equipment density and ask your supplier for samples before buying for a full rack.
Rack Cable Management FAQ
Should I use Velcro or zip ties?
Hook-and-loop fasteners are preferred inside the rack because they are adjustable and do not crush the cable jacket. Zip ties still work for permanent bundles on overhead ladder racks, but they should not be cinched tightly around patch cords.
How much patch cord slack should I keep?
Keep enough slack to move a cable one or two ports without reterminating. In most 19-inch rack positions, that means roughly 10 to 15 centimeters of extra length, stored in a horizontal manager rather than in front of the equipment.
Does cable management affect network performance?
Yes. Tight bends and tightly cinched bundles stress the conductors and can change the impedance of copper cables. On fiber links, sharp bends increase attenuation. Good cable management preserves the physical channel and makes certifying the link easier.
Can I use the same manager for Cat6 and Cat8 patch cords?
In most cases yes, as long as the manager opening is wide enough. Cat8 and shielded Cat6A cords have thicker jackets, so a manager with individual slots or wider compartments is easier to use than a solid open raceway.
Contact Us
Your email address will not be published. Required field are marked*


-
 No. 588, Xiaolin Avenue, Xiaolin Town, Cixi City, Zhejiang Province
-
 [email protected]
-
 +86-574-63507962
-
 +86-15988643730
Copyright Ningbo Betterbell Telecommunication Equipment Co., Ltd. All rights reserved. Structured Cabling Solutions Manufacturer Network Cabling Products Supplier
